Schedule A Mail in Gmail – No Additional Software Required
Usually, we all log in to our Gmail accounts, check our emails, reply to them and log out.
Sometimes we feel how nice it would be if we could schedule a mail in Gmail – meaning if we could send an email at a specific time without adding any software or Chrome Extension.
The good news is that Gmail already has this feature and it is very easy to use. We bring below step-by-step guide to schedule a mail in Gmail.
Step 1
Open Gmail and login to your account. Click on compose to write a new email as we all normally do.
Once you have completed your email, added the subject line and recipient’s email address, it’s time to schedule the date and time this email will be sent.
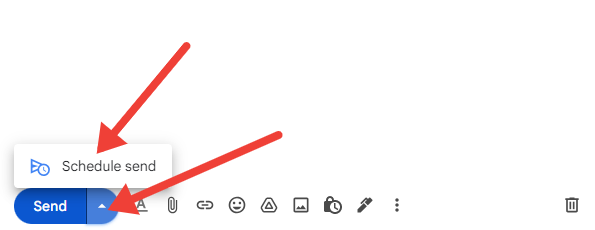
If you look carefully on the right of ‘Send’ button, you’ll notice a small arrow. Click on that arrow and you see ‘Schedule send’.
Step 2
Click on ‘Schedule send’ and you will see ‘Schedule send’ options.
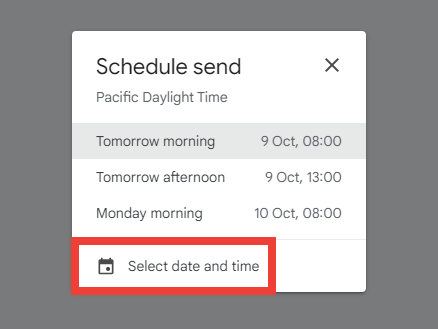
First three options are Gmail suggested send times and the last one is ‘Select date and time’.
Step 3
Click on ‘Select date and time’ and select Date and Time you want to send this email.
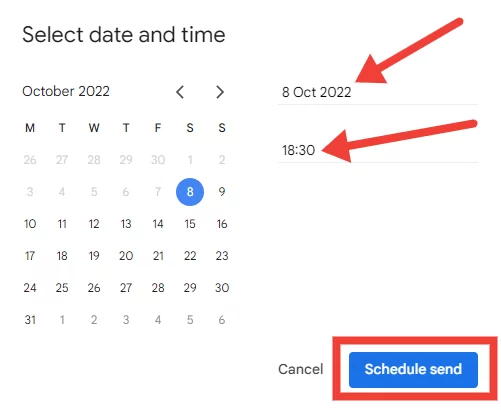
Click on the button ‘Schedule send’. Your email will be sent on desired date and time.
Conclusion
In this article, we saw how easy it is to Schedule A Mail in Gmail. No special skills or learning is required.
| You may also like to read the following articles: 5 Budget WiFi Routers For Home How To Enable Home Button In Google Chrome |